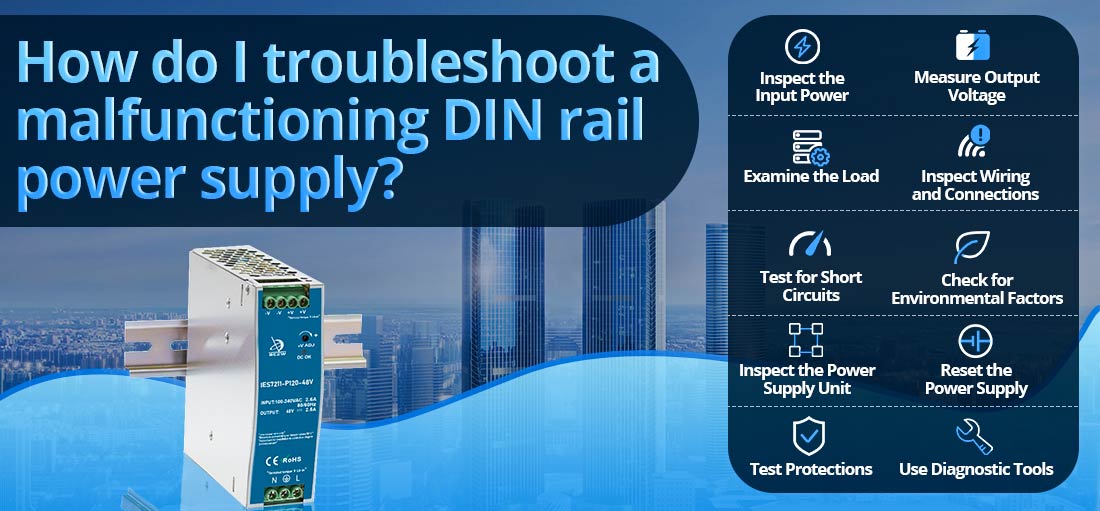
La resolución de problemas de una fuente de alimentación de riel DIN que funciona mal implica identificar y resolver sistemáticamente los problemas que afectan su rendimiento. A continuación se muestra una guía detallada para ayudar a diagnosticar y abordar los problemas de manera efectiva.
1. Síntomas comunes de mal funcionamiento
--- Sin voltaje de salida: La fuente de alimentación no proporciona ningún voltaje a la carga.
--- Voltaje incorrecto: El voltaje de salida es demasiado alto, demasiado bajo o inestable.
--- Operación intermitente: La fuente de alimentación funciona esporádicamente o se apaga inesperadamente.
--- Sobrecalentamiento: La unidad se calienta excesivamente durante el funcionamiento.
--- Ruidos inusuales: zumbidos o zumbidos provienen de la fuente de alimentación.
2. Precauciones de seguridad
Antes de solucionar problemas, asegúrese de lo siguiente:
--- Desconecte la energía para evitar descargas eléctricas.
--- Utilice herramientas aisladas cuando trabaje con circuitos activos.
--- Familiarícese con las especificaciones y el manual de la fuente de alimentación.
3. Pasos para la solución de problemas
Paso 1: inspeccionar la potencia de entrada
Verifique el voltaje de entrada:
--- Utilice un multímetro para verificar si la fuente de alimentación recibe el voltaje de entrada correcto según lo especificado (por ejemplo, 85–264 VCA para muchos modelos).
--- Asegúrese de que la fuente de entrada (por ejemplo, la red eléctrica) sea estable y esté dentro del alcance.
Inspeccionar las conexiones de entrada:
--- Verifique si hay cables sueltos, corroídos o dañados.
--- Confirme la polaridad para los sistemas de entrada de CC.
Paso 2: medir el voltaje de salida
Desconecte la carga:
--- Retire todos los dispositivos conectados para aislar la fuente de alimentación.
Salida de medida:
--- Utilice un multímetro para probar el voltaje de salida en los terminales.
--- Compare el valor medido con el voltaje de salida nominal (por ejemplo, 12 V, 24 V CC).
Paso 3: examinar la carga
Verifique si hay sobrecarga:
--- Asegúrese de que la carga conectada no exceda la capacidad de la fuente de alimentación.
Inspeccionar dispositivos:
--- Verifique que los dispositivos conectados funcionen correctamente y no estén en cortocircuito.
Vuelva a conectar dispositivos individualmente:
--- Agregue gradualmente dispositivos nuevamente al sistema para identificar los problemáticos.
Paso 4: inspeccionar el cableado y las conexiones
Examinar cables:
--- Busque cables deshilachados, dañados o de tamaño insuficiente que puedan provocar caídas de voltaje o cortocircuitos.
Apretar terminales:
--- Asegúrese de que todos los terminales de entrada y salida estén conectados de forma segura.
Paso 5: prueba de cortocircuitos
Terminales de salida:
--- Use un multímetro para verificar la continuidad entre los terminales de salida positivo y negativo. Una lectura que indica un cortocircuito sugiere un problema.
Dispositivos conectados:
--- Inspeccione si hay cortocircuitos internos en los dispositivos de carga o el cableado.
Paso 6: Verifique los factores ambientales
Temperatura:
--- Confirme que la fuente de alimentación esté funcionando dentro de su rango de temperatura.
--- Asegúrese de que haya una ventilación adecuada para evitar el sobrecalentamiento.
Ruido eléctrico:
--- Busque dispositivos cercanos que generen interferencias electromagnéticas (por ejemplo, motores, inversores) y reubique la fuente de alimentación si es necesario.
Paso 7: inspeccionar la unidad de fuente de alimentación
Inspección visual:
--- Busque signos de daño, como marcas de quemaduras, condensadores hinchados o componentes rotos.
Ajustar la configuración de salida:
--- Para modelos ajustables, verifique la configuración del voltaje de salida usando el potenciómetro incorporado.
Paso 8: restablecer la fuente de alimentación
Ciclo de energía:
--- Apague la alimentación de entrada, espere unos segundos y vuelva a encenderla.
Reinicio manual:
--- Si la fuente de alimentación tiene un interruptor o botón de reinicio, actívelo para borrar los modos de apagado de protección.
Paso 9: Probar las protecciones
Protección contra sobrecarga:
--- Reduzca temporalmente la carga y verifique si la fuente de alimentación reanuda su funcionamiento normal.
Protección térmica:
--- Deje que la fuente de alimentación se enfríe si se observa sobrecalentamiento y luego reiníciela.
Paso 10: utilice herramientas de diagnóstico
Multímetro:
--- Mide voltaje, corriente y resistencia para detectar anomalías.
Osciloscopio:
--- Analice la forma de onda de salida en busca de irregularidades, como ondulaciones o ruido.
Pinza amperimétrica:
--- Mida el consumo de corriente de los dispositivos conectados para identificar sobrecargas o cortocircuitos.
4. Soluciones basadas en observaciones
| Observación | Posible causa | Solución |
| Sin voltaje de salida | Entrada defectuosa, fallo interno | Verifique la entrada, revise los fusibles internos, reemplace la unidad. |
| Voltaje bajo o inestable | Sobrecarga, componentes defectuosos | Reduzca la carga, inspeccione y reemplace las piezas dañadas. |
| Calentamiento excesivo | Sobrecarga, mala ventilación. | Reduzca la carga, mejore el flujo de aire, reubique la unidad. |
| Operación intermitente | Conexiones sueltas, problemas medioambientales. | Conexiones seguras, abordar interferencias externas. |
| Protección contra cortocircuito activa | Cableado o carga defectuosos | Identifique y repare componentes o cables en cortocircuito. |
5. Cuándo reemplazar la fuente de alimentación
Si los pasos de solución de problemas no resuelven el problema y la fuente de alimentación:
--- Tiene daños internos visibles.
--- No logra entregar el voltaje correcto constantemente.
--- No puede manejar su carga nominal a pesar de que no hay problemas externos.
--- Es mejor reemplazar la unidad con un modelo compatible de alta calidad.
6. Mantenimiento preventivo
--- Inspeccione periódicamente el cableado y las conexiones en busca de desgaste o daños.
--- Mantenga la fuente de alimentación limpia y libre de polvo o residuos.
--- Opere la fuente de alimentación dentro de sus límites especificados.
--- Pruebe periódicamente los voltajes de entrada y salida para garantizar la estabilidad.
Conclusión
un mal funcionamiento Fuente de alimentación en carril DIN A menudo se puede diagnosticar y reparar verificando sistemáticamente el voltaje de entrada, la carga, el cableado, las condiciones ambientales y la propia unidad. Si sigue estos pasos de solución de problemas, podrá identificar la causa raíz y aplicar la solución adecuada. Si el problema persiste o la fuente de alimentación muestra signos de daños graves, considere reemplazarla para garantizar un funcionamiento confiable.